Posts

Complete!

Image
My summer project is complete! It's rough but it's exactly what I wanted and not bad for a first timer eh? I will eventually need to do some touch up paint work.   First trip will be on Sept. 24th down to Kerrville, TX! Happy Trails everybody!

Flooring

Image
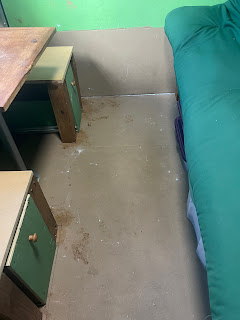
 For the last piece I bought peel and stick flooring from Wayfair  . It was very easy to peel and stick onto the floor. I used a Milwaukee Box Cutter.  Looks so good! Very happy with the way it looks. Brings everything together nicely.

Windows

Image
 I bought chicken coop windows - they were a quarter of the price of RV windows. They are sturdy, have a screen and a lock. They also fit perfectly snug. My buddy Dale and I tried to install the windows... twice. But we could not get through the steel. So I called Lopez Construction - a local company here in Taylor and Juan installed them in less than 2 hours - no problem! He did have to reinforce the front where the kitchen window is with two pieces of wood - there was too much of a hollow space there. Luckily I had some scrap 2 x 2's on hand. All the windows fit snugly. We used sealant on the inside creases of the windows when putting them in. And then clear sealant along the outside edges as well.  I love my windows! It really looks like a camper now.              On the inside there were quite a bit of gaps and hollows from cutting into the walls. I used spray foam and closed them up with 2x2's that framed the windows. Make sure you wear ...

Drawers

Image
 These drawers were the hardest thing out of all I did for this camper. I can't count the amount of times I took them apart and put them back together.   Even so - you will notice that the front drawer is not on a track. NOPE. I trimmed it too small and the tracks wouldn't catch. I was not going to go through all that again - it slides in and out just fine without a track. I used leftover pieces of wood and painted them. Yes, they are mismatched. No, I don't care. 

Lights

Image
 The cargo trailer already came with two interior lights - but they have to be connected to the car to work. I bought an over-head light and a under-cabinet light that should be sufficient. The under-cabinet light was easy enough The over-head light... not so much. First I couldn't use my hole saw kit because the drill bit in the center would have gone straight through the roof. The wood panel was very, very thin. So I got a little creative with it: Yes - Zip Ties. The ultimate fix-it.  It is not completely flush with the ceiling but - close enough. 

Decorations

Image
During the hottest part of the year I decided to go inside and work for a bit. I saw these really neat State & National Park maps on Etsy and made my own version. First I printed an outline of the USA & Texas in Poster mode. Did you guys know about Poster mode? I sure didn't until now. It's perfect for printing large things.  I taped carbon paper down underneath the outline and traced it. Then I used my wood burning pen to trace the outline.  I wanted to do little symbols of each national park instead of trees so I did a deep dive into what made each national park special and printed a copy of it.  For the Texas State parks map I used the star tip of the wood burn pen, then printed out a word document with all the park names written on it. This was so time consuming - but the end result was worth it! Looks good! Now to visit them all... 

Futon Bed

Image
 I was planning on doing a complicated pull out futon type bed but then I saw this on Pinterest: I thought this would be a better (and simpler to build) option. I started by setting out the legs - old fence post again. 18 inches high. Heidi inspected my work. Then the first flat piece - 21 inches long.  I ran out of wood so I had to improvise with what I had. Wood is so expensive right now! I hit a little snag with the rightmost hinge... But I managed to get it together in the end. When opened it is leaning a bit so I will have to add some fold down arms.

Kitchen Upper Cabinets & Power

Image
The kitchen upper cabinets were a challenge to build. Not build  but make secure I should say.  I used corner braces to secure all the joints and metal plates to secure the sides. I stupidly constructed the box without cutting out the hole for the power box. Cut hole first!  I made it work but it was not as easy or as neat as it could have been. I mounted the cabinet using heavy picture frame mounts from Home Depot. I used two 12 inch mounts for the top of the cabinet and one 18 inch mount for the bottom. I plan to put a divider and shelf in the upper cabinet so I can use the left side for storage after I get the power cord situation squared away. Why are there so many different cords? Initially I thought there was only 30 amp and 50 amp. But no. There are 4 prong 30 amps and 3 prong 30 amps. There are prongs with one bent prong. Argh! I had to buy one adapter for my 30 foot extension cord and a different adapter for my 50 foot extension cord.  This adapter connect...

Dinette

Image
For the Dinette I liked the idea of it being able to convert into a bed (like this guy did on YouTube) and also with storage underneath the seats.  First I made a rough outline of where I wanted the seats to go. Then I cut up some extra 4 x 4 fence posts that I wasn't using. I made them 18 inches long.  I am obsessed with Pocket Holes so I drilled 4 lower and 4 upper 1/2 inch pocket holes in each leg. I used 3/4 inch MDF board for the seats - they were 18 x 20. I left a 1/2 inch ledge on each seat facing the table for the bed conversion. 3/4 inch Tabletop was 27 x 20. Fit perfectly!  I added an extra fold up piece to make this longer using these brackets from Amazon. The table leg I bought from Amazon  and required a 2.5 inch recess in the floor. It is sturdy-ish. I will need to add a bracket connecting the table to the wall to make it more solid. Voila! Dinette! For the cushions I used some cheap foam mattress topper from Walmart and cut it to the size I needed....

Kitchen Sink

Image
 I have never plumbed anything before, ever. I tried installing a water filter under my house kitchen sink and failed. So I was nervous about doing this part of it. I cut out the sink outline from the countertop and placed the sink in. First try - perfect hole. Yes! I used a drop in bar sink The sink had clips that 100% did not fit which was really annoying. I ended up securing it with sealant. For the faucet I used an outdoor faucet  because I thought it was more rugged. Finding a way to connect that to the water inlet  was tricky but the good people at Moss True Value were super helpful. It did leak at first but then I remembered I needed to use tape on the fittings. Once I did that no more leaks! For the grey water I decided to use a 5 gallon water jug  and Snappy Trap . It was easy enough to install and get right the first time. I have a working sink!